386 files (2 files filtered)
-
 This mod is a teamwork of @fitfondue and @HughJanus.
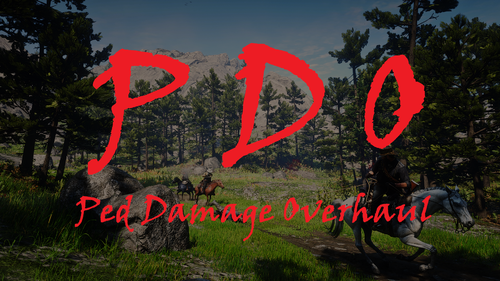
The beta version of Ped Damage Overhaul 2.0 has been released! It contains new features and major adjustments (described in the changelog), so we'd appreciate your feedback on any bugs and performance issues you encounter. When reporting performance issues, please post your system specs if you can!
Part of this beta are the "optional features" (which require LML to work). Those are separated in two files. One is responsible for longer reactions after dismemberment (not compatible with euphoria mods), the other increases the chances of arterial bleeding (e.g. for neck shots).
OVERVIEW
This mod tries to make gun fights more diverse, dynamic and interesting and keep them that way throughout the game.
You will find NPCs stumbling when trying to run with hurt legs, getting the wind knocked out of them when getting shot, squirming on the ground when fatally injured, moaning in pools of their own blood until they meet their end, clutching their wounds and stumbling around when hit, etc.
IMPORTANT KEYS (for toggling effects)
These are the standard keys, they can be modified via the ini file (as can everything else this mod adds to the game):
F9 - Toggling the mod on/off (the mod is enabled by default). F8 - Toggling "Kill Wounded Mode" on/off (is disabled by default). This mod adds a feature called "Dying States" which makes NPCs go down when injured and still stay alive for some time (until they bleed out). If "Kill Wounded Mode" is activated, NPCs will die instead of entering the "Dying States". F7 - Toggling "Longer Bleedouts Mode" on/off (is disabled by default). Per default this mod makes NPCs in "Dying States" bleed out within a maximum of 25 seconds (to not interfere with spawning waves of enemies during missions, which are only triggered when the first wave is dealt with). If "Longer Bleedouts Mode" is activated, NPCs will take longer to bleed out (more realistic, but also hindering during some missions). F2 - Toggling "Friendly Fire" on/off (is disabled by default). "Friendly Fire" currently only works for the Dutch Van Der Linde gang.
FEATURES
Here is a quick overview of the most important features:
First off, almost all of the features and their characteristics are based on chance, so the behaviors won't be the same every time you encounter them - which should ensure more diverse fights and keep things interesting for longer than vanilla does... that was the idea, at least 🙂
Almost every feature can be enabled, disabled or tweaked in the ini (more information further down the page), so this is not only a mod, but also enables you to create your own experience.
This mod only alters behaviors and attributes of human NPCs - animals or anything else remain untouched.
Light version:
NPCs will react to where they are being shot (leg shots will make them stumble when trying to run, hand shots will disarm them, torso shots will stagger them, etc.). When NPC's health decreases below a certain threshold, they fall over and don't get back up. Then they go through different stages of dying, each with its own randomized behavior. Eventually NPCs will die of blood loss. NPCs will sometimes (based on chance) audibly react when in hopeless situation (panicking, begging, cursing, etc.). There is a bleeding feature, which makes NPCs lose health after they have been fatally injured. It operates bassed on chance, so NPCs don't all bleed out in the same amount of time. NPCs burn alive for longer when set on fire. There is a chance of NPCs surviving a fire (although they won't be able to do much afterwards). NPCs have a chance of staying on the ground for a random amount of time when shot (based on their health) - so you can now knock the breath out of your opponents. For all included behaviors the movement and pain sounds have been adjusted (and also randomized) to hopefully make your experience more interesting.
Standard version:
The same features as in the light version apply as well as the following additions: NPC health and player damage tweaked to offer a more satisfying experience (no more bullet sponges). NPC damage tweaked to offer more challenge to the player (since NPCs don't eat bullets for breakfast anymore). You can now feel the difference between weapons, their condition and ammo types in combat (shooting with a properly maintained, powerful weapon with special ammo now feels like it should). NPCs are less accurate shots and their accuracy declines along with their health. Arm and leg shots do less damage to NPCs. All NPCs can be disarmed (yes, even lawmen). Hogtying disarms NPCs, so if they manage to get loose, they can't shoot you - they might draw a hidden knife, though.
Overhaul version:
The same features as in the standard version apply as well as the following additions: Core Drain (health, stamina, dead eye) has been moderately increased - now hunting and buying food become necessary options. Cores will be fully drained after death. Additional 25% of money lost after death.
We hope that you have as much fun with this mod as we have creating and improving it!
INSTALLATION
Download Alexander Blade's ScriptHook: http://dev-c.com/rdr2/scripthookrdr2/ Extract Dinput8.dll and ScriptHookRDR2.dll into the main directory of RDR 2 (where the .exe file is). If you want PDO's additional features, download Lenny's Mod Loader. If not, ignore steps 4, 5 and 8. https://www.rdr2mods.com/downloads/rdr2/tools/76-lennys-mod-loader-rdr/ Extract the folder Mod Manager into the main directory of RDR 2 (the actual Mod Manager folder, not just its contents). Then go into the Mod Loader folder and extract only its contents into the main directory as well (not the actual folder, just its contents). In the Mod Manager folder, run the ModManager.UI.exe file to make sure Lenny's Mod Loader is properly installed in the RDR 2 directory. Download your preferred version of Ped Damage Overhaul, then open the zip and choose whether you prefer Light, Standard or Overhaul configurations (see mod description to understand the differences). Extract the contents of the chosen folder into the main directory. If you're using Lenny's Mod Loader, any files pertaining to it will be automatically placed in the correct folder. If you're using Lenny's Mod Loader, run ModManager.UI.exe to see if the optional files are showing as installed. If they are, you're good to go. Start the game and have fun! While in game, you can press F9 to check if the mod was loaded correctly (F9 once to disable, then F9 again to re-enable the mod).
TWEAKING
In general, every parameter in the ini has a description (including information on how to disable the feature). Feel free to play around.
There are already a lot of features enabled and tweaked for out-of-the-box use, yet there are some features left untouched which can be enabled in the ini. That said, if you just want to disable one or more features, set their respective values to 0 (or whatever value the description suggests).
Examples:
To turn off the bleeding feature: set BleedWhenDying to 0 To turn off the disarming when hogtying NPCs: set HogtyingDisarms to 0 To turn off the dying state features: set DyingStateChance to 0
If you want to disable a feature which is based on chance, just set the chance value to 0.
Examples:
To turn off the knocking the wind out of your opponents: set KnockbackChance to 0 To turn off the possibility of NPCs surviving fire: set FireSurvivalChance to 0 To turn off the chance of stumbling when shot in the leg: set StumbleChanceOneLeg and StumbleChanceBothLegs to 0
There are also many other features that can be activated in the ini - here are some examples:
LassoDisarms -> makes catching someone with your lasso disarm them (no hogtying necessary) NPCWeaponModifier (and many other damage modifiers) -> makes NPCs do more or less damage, depending on what you set it to BleedWhenShot -> enables a bleeding feature which triggers when an NPC gets shot (so not the usual "bleed out when under x health" but consistent bleeding which is applied after the first hit of a bullet - the bleeding chance and deducted health points can be set separately)
The ini is full of values for those wanting to experiment a little.
One word of warning to tweakers: If the NPCHealth is set too high, headshots might not be lethal anymore, unless they hit the actual brain of the NPC (so a shot in the jaw would do more damage than other body parts, but would not be an instant kill). Actual "brain-shots" are always one-shot-kills, no matter the health.
KNOWN "ISSUES" (they are not real issues)
The disarming feature can be exploited to slow down new waves of lawmen. The same is true for the dying state feature. If there are too many lawmen dying or fleeing around the player, new waves won't spawn in until the lawmen die or get enough distance (this feature can be turned of in the ini file, if that is a deal breaker to you). When disarming is enabled, the dropped weapons may appear partly invisible. This is only optical, though, they can be picked up and used as usual.
The source code of Ped Damage Overhaul can be found here:
https://github.com/HJHughJanus/PedDamageOverhaulRDR2
If you are looking to enhance your experience by using an Euphoria Mod, please take a look at the work of @AnymYo.
C.E.R.R. is tweaked for cineastic reactions and designed to work with PDO:
-
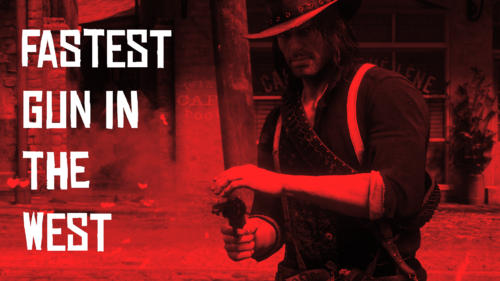 Ridiculously high fire rate and reload speeds for all non-special weapons, as well as massive spread reduction.
You have to equip improved iron sights on your gun for the mod to work!
except for the lemat revolver
Note: Most changes don't work on special and DLC guns.
UPDATES:
Version 1.2.0:
- Fixed the Mauser, Semi-automatic pistol, and the Varmint rifle by slightly lowering the fire rate for it to work when you paint targets in deadeye
- The Double action revolver's reload is now 2 bullets at a time.
- The Schofield's reload is now 3 bullets at a time.
- Revolver and Pistol long barrels now increases damage by 20%.
- Slight damage increase for shotgun long barrels (sawed off not included).
- Slightly decreased the Double action revolver's fire rate for a more double action feel.
- Slightly decreased the Volcanic's fire rate for less clunky cocking.
- Slightly decreased Sawed off's spread.
- Increased the lancaster and litchfield's fire rate.
Note: The lancaster and litchfield also has the deadeye painting problem but the fire rate has to go unimpressively low for it to work while painting people in deadeye, so its safe to say its much preferable to not paint targets while in deadeye when using these.
Make sure to delete the previous version in your lml folder before installing!
PDO ini 1.0.1 changes:
- Increased bleeding damage for NPCs.
CHANGES:
- Fire rate greatly increased on all guns.
- Reload speed greatly increased on all guns; special and DLC guns.
- Draw speed is increased by 3 times.
- Degradation is also slowed by 25% on all guns.
- Reticle spread is reduced by a lot that theres almost no spread.
- Camera fov when aiming is increased on all guns for quality of life.
- Double barrel shotguns are now more realistic by drastically increasing the fire rate (since double barrel shotguns have separate triggers) but most of the time they wont work in deadeye if you paint targets, cuz its really fast that it breaks.
Inspired from really fast firing videos on YT, you could say world records if it is.
INSTALLATION:
Extract the rar and drop "Fastest Gun In The West" into your lml folder.
Heres my lemat mod since this mod doesn't work on DLC weapons:
Better and Faster Lemat Revolver
UPCOMING UPDATE NEWS:
Nothing to see here for now.
- 20,271 Downloads
- 127325 Views
- 111.89 kB File Size
- 3 Comments
Updated -
 Replaces holster / unholster animations for the right holster and the knife sheath when sitting on a horse or when standing in cover.
Also affects holstering/un-holstering on coaches but its a bit wonky there.
Requires Lennys Mod Loader. For installation put the Holstering animation folder inside lml folder.
Version 1.1: -Replaced holster animations for shortarms when crouched behind cover
Version 1.2: -Replaced holster animations for longarms when behind cover
-Character will not holster longarms if its holding it in a hand before mounting a horse(when character is running)
-Character will not holster longarms if its holding it in a hand before getting on a stagecoach (does not work on a few wagons)
Version 1.2.1: - fixed weapon wheel not appearing after picking up long arms
Version 1.2.2: - fixed character holstering weapons when dismounting from a horse
- 22,206 Downloads
- 108507 Views
- 3.09 MB File Size
- 1 Comments
Updated -
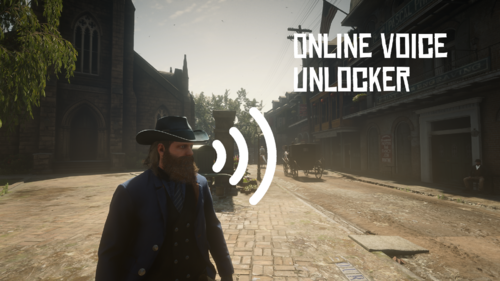 This mod allows you to use Multiplayer player ped voices in Story Mode.
Note that this mod is intended as a dependency for other mods and is not a mod for the end user to use.
This mod was intended to just unlock the VOFX online voices for mp_male and mp_female, but this mod may unlock other things audio related.
Online Content Unlocker and Asi Loader fail to do this, probably missed the file responsible for this.
Mirror: https://www.nexusmods.com/reddeadredemption2/mods/1971/
- 1,273 Downloads
- 32983 Views
- 85.53 kB File Size
- 5 Comments
Updated -
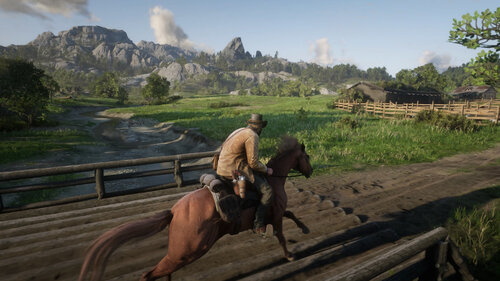 Riding and looking around now feels more enjoyable.
The camera has some sort of pull towards the center when you look around, which is especially noticable when galloping(sprinting on horse). It's also kind of annoying to steer with the mouse because the camera gets closer to the horse everytime you move it and then pulls away when you stop moving your mouse. The only way it can be disabled is if you pull out your gun or with this mod.
It's a bit hard to show in a video but here it is
-
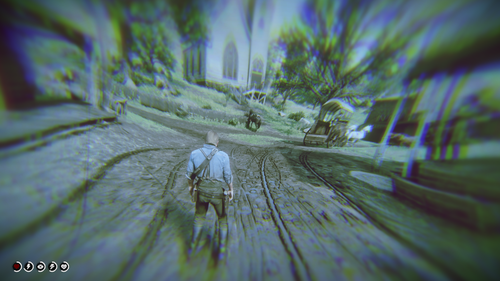 Removes all screen effects that occur with dead eye, eagle eye, tonic consumption, drunk character...
Requires Lennys Mod Loader. For installation put the Remove Screen Effects folder inside lml folder.
If your are using some weird resolution and the screen is black during cutscenes or black bars are not gone completely, open cameras.ymt file with the notepad, go to line 46341 or search for this: <UNK_MEMBER_0xAE00384B. Raise the value until the black screen disappears or lower it until black bars are gone. It is set to "1.77800000" at the moment. Default value was "2.35000000".
Version 1.1: -fixed cameras
-fixed minigames
-disabled camera sway
Version 1.2: -fixed mission Home of the Gentry
-knock out an npc effect removed
-player hit by bullets effect removed
-dead eye critical area effect removed
-removed cameras.ymt file ( use other mods to disable camera shake)
Version 1.2.1: -fixed mission Home of the Gentry in Eagle Eye And Dead Eye versions
Version 1.3: -disabled weapon wheel filter
Version 1.3.1: -removed auto-aim for the rifles when locked on a ped
Remove camera shake:
Version 1.1: -fixed camera auto-align on horse
-fixed camera while swimming
Version 1.2: -removes top and bottom black bars on ultra wide screens
Version 1.3: -camera can now be moved freely when you lock on another ped for interaction (auto-aim is now disabled)
-reduced death cam duration
Version 1.4: -disabled Dead Eye when dueling
-removed effects when waking up (too much drinking)
- 5,043 Downloads
- 39152 Views
- 6.83 MB File Size
- 5 Comments
Updated -
 Version 1.0
Requires: Community Script Hook RDR2 .NET V2
Description: A simple script to slow the game down whilst playing and vice versa.
Usage: 1) Install Community Script Hook RDR2 .NET V2
2) Place all files in the zip into Red Read Redemption 2/Scripts
Default keybind is 'Y', default timescale of the mod is 0.40.
Keybind and TimeScale can be changed in Config.xml, as well as:
F3 lets you change the timescale. Enter a floating point (e.g 0.2, 0.3, 0.80)
F4 lets you change the bind. Refer to (Microsoft Key Code) for keycodes. 'Y' works, as does '89', which is also Y.
SSM.zip
-
 Makes weapons holster / unholster 50%, 25% or 10% faster. You can increase or decrease the speed by editing these lines in weapontasks.ymt file:
Line 91 - when standing or on a horse
Line 95 - when crouched in cover
Line 101 - when standing in cover
Line 104 - when crouching
Requires Lennys Mod Loader. For installation put the Faster Holstering Unholstering folder inside lml folder.
- 12,092 Downloads
- 59784 Views
- 8.38 kB File Size
Updated -
 Version 1.1: Removes top and bottom black bars on ultra wide screens.
If your are using some weird resolution and the screen is black during cutscenes or black bars are not gone completely, open cameras.ymt file with the notepad, go to line 46341 or search for this: <UNK_MEMBER_0xAE00384B. Raise the value until the black screen disappears or lower it until black bars are gone. It is set to "1.77800000" at the moment. Default value was "2.35000000".
If you are using cameras.ymt file in some other mod you only need to change the value at line 46341 to "1.77800000".
- 8,787 Downloads
- 41351 Views
- 143.49 kB File Size
- 2 Comments
Updated -
 Photo Mode Converter 🚀
This app allows you to convert local images from the game without having to upload them to Social Club.
Features:
An auto installer (one-click to run) Fast performance Lightweight Simple and easy to use
How to use it?
Download the setup file and run it. You can now access the app from Start Menu. Specify the folder where your local photos are stored (depends on the version: Steam, Launcher, ..) Click "Convert" and wait for a few seconds .
How does it work?
In essence, it repairs the broken* JPEG files generated from the game using Syping's Rage Photo Library. Kudus to him for building such library in the first place.
A must note is that this is the first version, and therefore, bugs are expected. Feel free to report them at Github.
- 2,113 Downloads
- 30196 Views
- 17.5 MB File Size
- 8 Comments
pointerboy in ToolsUpdated -
 Buy your own customizable wagon, stagecoach or boat and transport people or goods all over the west to make an honest living (AND MORE).
Main features in short:
- Buy your own customizable wagon, stagecoach or boat. (Hot air balloon and "portable" Maxim Gun is also available to buy)
- Earn money by taking jobs at general stores, hotels or saloons, and transport goods or people all over the map, including every town and 46 minor locations.
- Find gang hideouts and retrieve stolen cargo or wagons from them. (the hideouts are added by the mod, not the vanilla ones)
- Protect your goods or passengers from random bandit attacks during jobs (with optional random bandit attacks outside of jobs).
- Work as a bounty hunter, capture criminals dead or alive.
- Hire people to work for you, drive your wagon or provide protection against the dangers of the road.
- Work on your ranch at Beecher's Hope and transport your goods to Blackwater, Armadillo or Tumbleweed to sell them for a handsome profit.
- Deliver special hunting / fishing requests for butchers.
- Zombies, because everything is better with zombies... (disabled by default)
Buy your own customizable wagon, stagecoach or boat:
Go to the general store in any town, approach and target the owner for the "Jobs / Wagons / Boats" prompt to come up.
The menu should come up where you can chose from several wagons, stagecoaches or boats. After choosing one, leave the store and find the wagon or boat outside to customize it. There you can confirm your purchase or go back to the store to chose another one.
Once you own a wagon or boat you can change it's customization options or store it any time at the store.
If your boat or wagon is not nearby or missing it's horses you can repair and recover it for a fee at general stores. Recovering your wagon during a job will fail the job.
However, if you wreck it, it'll be gone for good and you need to buy a new one.
Wagon / boat menu: Press the hotkey while you're sitting in your wagon or boat, or hold the key for a second while standing near them to bring up the menu.
- You can open your weapon locker from the wagon menu.
- You can switch between your saved custom outfits, so you can change your clothes or weapons without your horse being nearby.
- It lets you make some changes to your wagon on the fly, like adding / removing lights.
- You can store / unpack your maxim gun if you own one.
Steam boats have a 'get on board' option that'll make your hired guns get on board.
The hotkey is not bind by default, find the "WAGON_MENU_KEY" option in the ini to set it.
When you buy a wagon it spawns in somewhat of a remote location to avoid spawning on top of something else, a yellow wagon wheel icon shows it's location on your world map if you're not sure where to find it.
Boats:
There are some teleport zones near a few bridges that'll put you from one side of the bridge to the other, so you can traverse some rivers with boats you couldn't otherwise.
You can sail to Guarma if you own a boat by traveling north up river. The "Sail to Guarma" prompt should come up shortly after you passed Annesburg. (I only tested it in the epilogue, I don't know if it causes any issues if you travel there earlier in the story)
There's an "auto forward" function for boats so you don't have to keep pressing the forward key the whole time. It's disabled by default. You have to set BOAT_FORWARD_KEY in the ini to whatever key you use as forward for boats. After that, a forward prompt should appear when you're in a boat.
It's a script that just presses a key on your keyboard, and it'll be pressed even if you alt+tab out of the game, so make sure to stop your boat before you alt+tab or close the game...
Delivery jobs:
You can also find delivery jobs at general stores.
There are two types:
- "Supply delivery jobs" where you need to use your own wagon to transport things.
- "Wagon driver jobs" where you get a job wagon that you need to take. (you can't use your own wagon for this type)
Both types has "deliver" and "fetch" versions.
"Deliver" means you load your wagon where you started the assignment and deliver it to a destination.
"Fetch" means you go to a different place, load your wagon there and bring the supplies back to where you started the job.
How a delivery job is done:
When you accept a job you'll see a blip on your map marking the place where you have to load the supplies into your wagon. You'll also see a wagon wheel icon for your job wagon if it's that type of job. Park your wagon nearby and the prompt to load your wagon should come up.
After that, a new blip should mark the place you're supposed to deliver the goods. Drive your wagon there and use the prompt to unload you wagon. The job is completed at this point, you can talk to the store owner at your destination to pick up your payment, or pick it up later at a train station / post office. (you get a few bucks more if you pick it up in person)
Passenger transport jobs:
You can find these jobs in hotels / saloons (same as above, approach and target the owner / barkeep).
There are also two types:
- "Passenger transport jobs" where you have to use your own stagecoach.
- "Stagecoach driver jobs" where you use a borrowed stagecoach for the job. (can't use your own)
You might have to stop at minor locations to drop off or pick up passengers on your way to your destination. You can customize how many stops you want in the ini.
How a stagecoach job is done:
Once you accepted the job find your passengers (they're usually upstairs, check your map for blips). They should follow you to your stagecoach and get in with you.
A blip on your map should mark your destination. If the job has multiple stops the blip will mark the first stop. Once you're there, the prompt to confirm the destination should show up. If there are more stops a blip on your map will show the next stop. It goes like this until you're at the final destination.
At each stop some passengers will get off, and there might be new ones to pick up. You can take your payment from every passenger one by one at their destination (stand close and target them for the prompt). They'll only hang around for a short time, if you don't take their payment you'll be able to pick it up later at a post office / train station in any town. (They give you a few extra bucks if you take it from them in person)
Recover stolen cargo / stolen wagon jobs:
You can find these type of jobs in general stores.
Just like the other job, there is two type:
- Recover cargo using your own wagon.
- Recover stolen wagon (no need to own a wagon)
How a recovery job is done:
Go to the hideout marked on your map. Once you engaged the bandits in combat, getting too far from the objective will fail the job - they'll get away with the goods (but also for technical reasons).
After you dealt with the bandits, park your wagon near the spot and use the prompt to load the cargo. If you're recovering a stolen wagon you still have to load it, too.
As optional side objectives you might find hostages to rescue or wanted bandits to capture. Bring them back with you dead or alive to earn some extra cash (alive pays more, especially for the hostages...).
Head back and unload the goods at the store you started at, and take your payment from the owner.
There are a random amount of bandits at each hideout, larger ones can have up to 20 of them, so make sure you're up for the task!
Delivery jobs using boats
...are pretty much the same as the wagon ones. You have to get out of your boat and stand on the shore to load / unload the cargo.
Recover stolen cargo by boat:
You need to own a tugboat for these jobs. Sail out and find the pirate ship on the Lanahassee river. Kill them and 'park' your boat next to theirs. Get on board the pirate ship for the "transfer the cargo to your boat" prompt to come up. After that return the cargo and unload it at your starting location.
Sometimes you can come across "Wanted pirates" you can bring back dead or alive for a small extra profit.
Failing a job usually results in having to compensate your employer for the trouble you caused.
Jobs don't persist when you quit the game, but exiting the game during a job doesn't count as failing them either (no fine).
Beecher's Hope:
Instead of selling your goods by magically making them disappear, actually drive the wagon to town to sell them for extra profit.
There's a wagon on the ranch that's being used to transport the goods (if you don't know which one just start doing the chores and you'll see). While you're near the back of this wagon the "job menu" will come up, listing all the chores around the ranch.
Every chore you complete before selling the goods will increase the payment you'll get - even unrelated ones like chopping wood.
Once you loaded two egg crates and two milk jugs on the wagon the "Sell goods" option will be available in the menu (but you can keep doing chores for more profit).
Once you selected the 'Sell goods' option you can chose to sell them at Blackwater, Armadillo or Tumbleweed. The farther location you chose, the more money you'll get.
Once you're there, unload the cargo, talk to the shopkeeper to get your payment then return the wagon to the ranch to finish the job.
You can do it once a day, the job resets every midnight, whether you finished it or not.
Bounty Hunting:
Find the sheriff (wherever he is) or talk to a deputy in the sheriff's office / police station to take these jobs. (In any town except for Van Horn and Armadillo)
Find the target, bring them back by any means, then talk to the sheriff / deputy to get your reward.
Sometimes the target is wanted *alive*, you'll fail these jobs if the target dies. (Even if wanted dead or alive, you get a small bonus if you bring them back alive).
Sometimes the target will try to flee while their allies fight you . Their icon only shows up on the map if they close to you so make sure you don't lose sight of them.
If you bring them back alive you have to put them into a cell then the deputy will give you your reward. If dead, just throw them anywhere in the building, target the deputy, open the jobs menu and select 'complete job' to get your reward.
There are high reward and low reward bounty jobs:
The high reward ones will take you to gang hideouts with up to 20 or so bandits.
The low reward ones will take you to a smaller group of bandits (4-6), that'll you'll find either in a small campsite or travelling around on horse, on foot, or in a wagon. If they have a wagon, bringing it back to the sheriff's office will earn you a little extra reward.
Pirate Hunting:
Pretty much the same as bounty hunting, only you'll find your target on a boat on the Lanahassee river. You don't need to own a boat for these jobs, just return the target any way you can. (though you might sink if you use a vanilla boat, the mod only prevents you owned boats from sinking in deep water)
Hunting / Fishing jobs:
You can find special hunting requests at any butcher.
You need to deliver the actual animal unless it's specifically says 'pelt' or 'skin'.
To deliver you need to drop the requested animals on the ground near the butcher and press 'Deliver' in the menu. Animals you're about to sell should be listed on the deliver page.
Things you hold in your hands or stowed on your horse will NOT be sold (to prevent accidentally selling things you don't mean to).
Normally these requests change every day. Pressing 'accept job' will prevent the requests from changing until you delivered or cancelled the job. (Otherwise you can deliver stuff without accepting the job first, it's just to prevent the requests changing while you're out hunting)
You can deliver as many requested animals as you want (multiple ones of the same type too), but once you delivered, the requests will change so make sure everything you want to sell is listed before you hit 'Deliver'.
They'll pay a little extra for better quality (except for fish, couldn't figure out how to do that yet..)
Bandits:
There's a chance that a random group of bandits will attack you during jobs. Be prepared and watch your back! Customizable in the ini.
There are also 24 bandit hideouts added by the mod, with 15+ bandits. Some jobs will take you to them but you can also find them outside of jobs.
There are also ini options to enable random bandit attacks outside of jobs, and random roaming bandits outside of jobs, who'll not attack you just go about their own business.
Hired Guns:
Hire people who'll travel with you and (try to) protect you from bandits (or anything else). To do so, talk to the barkeep in any saloon.
You can hire random people or you can customize their looks and weapons to your liking.
Hired Guns will not fight while in a town.
Story characters are also available.
- You can use the 'Rest & Recover' option in the menu that will teleport your hired guns to you in case you got separated, they'll be cleaned and their hats and weapons will be recovered if they lost them.
- They automatically go into "sneak and hold fire" mode while you're crouching / sneaking outside of combat.
- If the "Allow revive" option is enabled, instead of dying then can go down into an injured state and they can be revived by crouching close to them until the 'Help' prompt fills up (10 seconds)
- Making hired guns drive:
Target them and use the "You drive" prompt. Put down a custom waypoint on the map to make them drive there. Deleting the waypoint will make them stop. Use the 'speed up' and 'slow down' hotkeys to change their driving speed (up arrow and down arrow by default).
Their driving skills are ok-ish, generally they'll find their way from point A to point B, but sometimes they can take a wrong turn... Also, they can't really turn around.
If you're sitting next to them, you can take away / give back the control with the 'switch seats' key, should be 'Z' on keyboard. Make sure you stop them (slow down key until they're fully stopped) before you take away the control, or they might bug out.
- Using the 'Wait for signal' command will make them stay and don't do anything until you signal to them by whistling.
-The 'Ride with me' command will prevent them from spawning in their own horse. If there's another free horse around they'll use that, but if not they'll ride with you on your horse.
Commands menu: You can also give commands to them through their command menu, Numpad 1-3 keys by default.
The command menu has some extra commands:
- Aim at person while the menu is up: Attack target, lasso target
- Aim at dead / hogtied person: pick up target
- Aim at horse: put carried body on horse
- Aim at downed hired gun: help up (it'll take them the same amount of time as for you)
Buyable Maxim Gun:
You can buy it in gun stores.
You can pick up the gun and carry it around by standing close to it and holding the reload key for a second or so.
You can also put it down by holding the reload key. Holding the attack key (left mouse) while you're putting it down will snap it to the ground, in case it keeps falling over.
You can store it on your wagon or boat using the wagon / boat menu, and you can also buy extra ammo that you can store on your wagon / boat. To store it, it needs to be close to the wagon.
Right now storing the gun or simply putting it down next to the wagon will reload it from the wagon's ammo stash.
Zombies:
They're disabled by default, you can enable them in the ini or in the debug menu (see below).
There are some options in the ini to customize them, like how many should spawn, how aggressive they should be during the day or night, or for them to burst into flames when they die just for the spectacle.
Sheriffs in towns will pay 5$ for every undead you hunt down and bring back to them. For a corpse to count they have to be nearby in the back of your wagon, stowed in your main or temporary horse (with the icon, not just any horse), or carried by you in hand.
They won't spawn while you're in a town.
Pick up you payment / pay your fines at train stations / post offices.
If you didn't pick up your payment in person after completing a job or you have a fine to pay you can do it at train stations / post offices. Only in towns, might change later.. Walk up to a station clerk and target them for the prompt to come up.
Banking:
You can store your money in banks to keep your hard earned cash safe, or take a loan to buy a wagon and start your business.
Stored money will earn you 0.5% interest a day. Loans will be added to your bounty (with an added fine) if you don't pay it back in time.
You can set in the ini if you want to get jobs to New Austin or not. (turned on by default)
Major locations with job givers:
Valentine - General store (job, wagon), Hotel (job), Saloon (hiring), Sheriff's office(bounty), Butcher (hunting), Train station (payment)
Strawberry - General Store (job, wagon), Welcome center (job), Sheriff's office(bounty), Butcher (hunting), Post office (payment)
Rhodes - General store (job, wagon), Saloon (job, hiring), Sheriff's office(bounty), Butcher (hunting), Train Station (payment)
Saint Denis - General Store (job, wagon, boat), Saloon (job), Bar (hiring), Police station(bounty), Butcher (hunting), Train Station (payment)
Van Horn - Store/Fence (job, wagon, boat), the Depot (where you can rent a room - job, payment), Saloon (hiring)
Annesburg - Gunsmith (job, wagon, boat), Train station (job, payment), Sheriff's office(bounty),
Blackwater - General store (job, wagon , boat), Saloon (job, hiring), Sheriff's office(bounty), Butcher (hunting), Train station (payment)
Armadillo - General store (job, wagon), Saloon (job, hiring)
Tumbeweed - General store (job, wagon), Saloon (job, hiring), Butcher (hunting), Sheriff's office(bounty)
Lagras - Store (job, boat)
There are also 51 other minor locations in the mod that are only job destinations with no job givers, 36 gang hideouts and many minor bandit campsites.
Debug / cheat menu:
Open the debug menu by holding down the Wagon menu key for a couple seconds while on foot.
Set the hotkey in the ini - WAGON_MENU_KEY. You can also disable the debug menu in the ini.
- Respawn wagon: Let's you respawn the wagon you own with horses - in case it spawned in without horses. You have to be near the wagon.
- Respawn Boat.
- Respawn Hired Guns: Respawns all your hired guns and teleports them to you, in case you lost them somehow.. It *might* help if they stopped following or bugged out in some other way.
- Remove fine - in case you failed a job due to a bug.
- Select Job Destination: If enabled, you can select destinations for any job by pressing the left and right key in the job menu.
- Trigger random attack.
- Despawn all bandit hideouts: In case they're in the way during a story mission or something...
- Reset Hideout Spawn Cooldown: Normally once you attack a hideout it won't spawn again for a while. This resets the cooldown so they spawn again even if you just cleared them out.
- Enable zombies
- Teleport to main land: If you travel to Guarma and somehow get stuck there you can use this to teleport back to Annesburg.
Known issues:
-The revive mechanic for hired guns is incompatible with some mods that change NPC health, it will cause them to start dying right after they're spawed in. You can disable it in the ini if you're experiencing issues.
- You can't return bounties alive to the Rhodes sheriff office before chapter 4. You can still return them dead though.
- The "mount up" command for hired guns can be wonky. The game handles their horses spawning in and it can take a while sometimes. They also won't mount up while you're sitting in a vehicle, so if you want them to follow your wagon on horseback, wait for them to get on their horses before you get into your wagon.
Installation:
Download AM&JMTransport.rar, extract it and drop the files into your Red Dead Redemption 2 game folder.
You're going to need Script Hook By Alexander Blade.
https://www.dev-c.com/rdr2/scripthookrdr2/
Credits: Some of the "own a wagon" part of the code was straight lifted from opsedar's Stash That Wagon mod. Big thanks for him for all his work and especially for open sourcing them ❤️
-
 Removes the annoying VRAM message ingame.
If there is a virus detection on this software, it is a false positive. Refer to your antivirus documentation for information on how to exclude the file.
Code (Requires minhook and a pattern scanner to work):
static const char* (*g_origGetText)(void* theText, int a2, uint32_t* hash, int* a4); static const char* GetText(void* theText, int a2, uint32_t* hash, int* a4) { if (*hash == 0xA3774AB6) { return ""; } return g_origGetText(theText, a2, hash, a4); } //Put this into the initalization code. CreateHookAndNotifyAnyError is MH_CreateHook but is a wrapper that alerts the user with a message box if //something went wrong. CreateHookAndNotifyAnyError(hook::get_pattern("48 81 C1 D0 00 00 00 E8 ? ? ? ? 48 8B CE 83 FB FF 74 ? 44 8B 44 24 50", -57), GetText, (void**)&g_origGetText)
- 3,698 Downloads
- 25980 Views
- 122.64 kB File Size
- 2 Comments
WesternSpace in MiscUpdated -
 This is just an example on how to replace the game loading screens since it seems it is not that straightforward. I highly recommend not using the artistic imagery I included, but suit yourself.
-
 Changelog:
1.0
Initial upload
Requirements:
Lenny's Mod Loader
Installation:
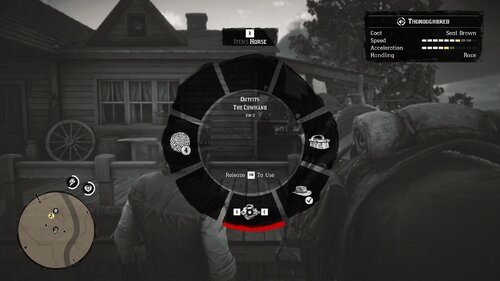
Place the "cowhandFix" folder inside your "/Red Dead Redemption 2/lml/"
There exists an issue in the Epilogue where when storing "The Cowhand" on your horse, you actually couldn't select it/change to it from your horse. But when checking the wardrobe, the game would still claim the outfit is stored on your horse. This turned out to be an easier fix than I thought. All I had to do was simply add an entry for The Cowhand to quickselectitems.ymt, since apparently it didn't already have one, which is what prevented it from appearing in the quick select menu on your horse.
On the off-chance this somehow conflicts with other mods that introduce new outfits and adds entries for them to quickselectitems.ymt, all you need to do is add the follow entry to said YMT file. Just make sure the "SortOrder" value isn't already being used. Change it as needed.
<Item key="0x35171C33"> <Slots> <Item> <Id>OUTFITS</Id> <SortOrder value="85"/> </Item> </Slots> </Item>
-
 Changelog
2.0
Replaces the Missouri Fox Trotter in the Lemoyne stables now 1.0
Initial upload
Requirements
Lenny's Mod Loader
Installation
Place the "restoreLiverChestnut" folder inside your "/Red Dead Redemption 2/lml/"
Replaces the Missouri Fox Trotter Amber Champagne with the cut, Hungarian Half-Bred Liver Chestnut horse.
In the unmodded game, this horse could still be seen in one of the stalls of the Lemoyne Horse Shop, thus my decision to place it here. For balance purposes, it won't be unlocked until Chapter IV, and due to its' high stats, costs $950.
The Liver Chestnut Hungarian Half-Bred is speculated to be Arthur's main horse, Boadicea, that was killed before the events of Chapter One, and possibly featured in the cut prologue chapter of the game. This war horse sports high, unique stats unlike any other Hungarian Half-Bred coats in the game with level 10 health and level 9 stamina at max bonding level, and a speed level of 7 and acceleration level of 6 with the right saddles.
-
 How it works:
This is basically Neodymium's GTA5 Texture toolkit but only with the components to create a texture file (.ytd). This means that you can't export the files from "ytd" files but you can do that with OpenIV. You can't also load "ytd" files. This program also uses the RedM "ytd" file converter from the RedM client to convert the files to the "ytd" format that RDR2 recognizes. This is NOT included with the program. There are existing ways to make RDR2 Ytd files but this tool makes it more easy and not as tedious.
How to Use:
After opening the program, click File>New. Now you can import files by clicking Edit>Import. NOTE: The program only accepts DDS files explicitly. This means if the file ends in .dds but wont open in the program, the file is not in DDS format even if it ends in .dds. If you need to delete a unwanted image, select the image you want to delete then click Edit>Delete. When you are ready to create a new "ytd" file, click File>Save. Select the folder to put the "ytd" file in. Two "ytd" files will be created. The"ytd" file that has "_nya" in it, is the file that can be used in RDR2. You can delete the other file. The "ytd" file that has "_nya" in it, can now be renamed to whatever you want and can now be used in Lenny's Mod Loader.
How to install:
Before installing, please read the Requirements section to see what you will need before installation.
NOTE: If the files are not downloadable e.g. false positive on virus scan, then download from GitHub mirror under the mirrors section.
Portable install:
NOTE: Only downloadable on GitHub because virus scans always get a false positive on this tool. Go to mirrors and click on GitHub to go to the download page on GitHub.
This is for short term use only.
1. Download RDR2 Texture Toolkit Portable then extract the files to a folder.
2. Run the exe file.
3. Follow setup instructions.
4. Done!
Package install (deprecated 😞
This is for long term use and will actually install the program.
NOTE: This will not work if you are on a version of Windows 10 earlier than version 2004.
1. Download RDR2 Texture Toolkit then extract the files to a folder.
2. Click on the .cer file. Then follow the instructions on screen. This is to allow you to install the program.
3. Click on the .msixbundle file.
4. Click install. If it does not allow you to install, repeat step 2, but select Local Machine in the prompt. If all fails, use the portable version.
5. Run the program.
6. Follow setup instructions.
7. Done!
How to update the tool:
These instructions will tell you how to update the tool.
1. Download the latest version of RDR2 Texture Toolkit then extract the files to a folder.
2. Click on the .msixbundle file.
3. Click update. If it does not allow you to update, click on the .cer file. Then follow the instructions on screen. This is due to the .cer file being expired.
4. Done!
Mirrors:
If you cannot download the tool or need the portable version, here is the list of mirrors available
Github Nexus Mods
How to Report a bug/issue:
If you find a bug/issue, please report it Here. Do not report it as comments as these kinds of reports can be hard to find when there are many comments.
Credits to:
Neodymium for his code on GitHub and the original GTA5 Texture ToolKit. CitizenFX for the conversion tool or this program would not exist. Converter is NOT included with the tool.
Links:
Source Code GitHub Profile
Requirements:
RedM by CitizenFX: Required to for this tool to work.
Permissions:
Credits and distribution permission
Other user's assets All the assets in this file belong to the author, or are from free-to-use modder's resources.
Upload permission You can upload this tool to other sites but you must credit me as the creator of the file.
Modification permission You are allowed to modify my tool and release bug fixes or improve on the features so long as you credit me as the original creator.
Conversion permission You can convert this file to work with other RAGE engine games as long as you credit me as the creator of the tool.
Asset use permission You are allowed to use the assets in this tool without permission as long as you credit me.
Asset use permission in mods/files that are being sold You are allowed but discouraged to use assets from this file in any mods/files that are being sold, for money, on Steam Workshop or other platforms.
License:
MIT License
Copyright (c) 2021 WesternGamer
Permission is hereby granted, free of charge, to any person obtaining a copy
of this software and associated documentation files (the "Software"), to deal
in the Software without restriction, including without limitation the rights
to use, copy, modify, merge, publish, distribute, sublicense, and/or sell
copies of the Software, and to permit persons to whom the Software is
furnished to do so, subject to the following conditions:
The above copyright notice and this permission notice shall be included in all
copies or substantial portions of the Software.
THE SOFTWARE IS PROVIDED "AS IS", WITHOUT WARRANTY OF ANY KIND, EXPRESS OR
IMPLIED, INCLUDING BUT NOT LIMITED TO THE WARRANTIES OF MERCHANTABILITY,
FITNESS FOR A PARTICULAR PURPOSE AND NONINFRINGEMENT. IN NO EVENT SHALL THE
AUTHORS OR COPYRIGHT HOLDERS BE LIABLE FOR ANY CLAIM, DAMAGES OR OTHER
LIABILITY, WHETHER IN AN ACTION OF CONTRACT, TORT OR OTHERWISE, ARISING FROM,
OUT OF OR IN CONNECTION WITH THE SOFTWARE OR THE USE OR OTHER DEALINGS IN THE
SOFTWARE.
- 3,338 Downloads
- 45195 Views
- 4.74 MB File Size
- 1 Comments
Updated