


RDRMC Guide to Custom Timecycle Boxes
What is a timecycle box?
A timecycle box is a physical box you can place around the map that you can attach certain timecycle modifiers to. This is used for when you want certain visual lines to apply to specific spots on the map, this can be useful for a lot of stuff like giving specific regions of the map their own visual style, fixing AMV/lighting bugs in specific spots (one example of this is the "undead nightmare" bug), or easily applying timecycle modifiers to the entire map without worrying about conflicts/adjusting each weather individually.
All you need are the 2 files attached to this post (found at the bottom of this page), and a copy of Codex 28
The first step is to open Codex 28's world viewer, and select the dropdown list in the top left where it says "Entity", and change it to "Time Cycle Modifier"

What you are seeing here is every vanilla timecycle box (found in the vanilla map_mods.ymap)

Come up here to the top left and choose File --> Open, then select the map_mods.ymap I sent above, this is simply an empty version of the ymap so you can remove all these vanilla boxes from view so they aren't in the way

Now that the vanilla boxes are gone, choose File --> Open again and select the map_mods_tutorial.ymap I sent above

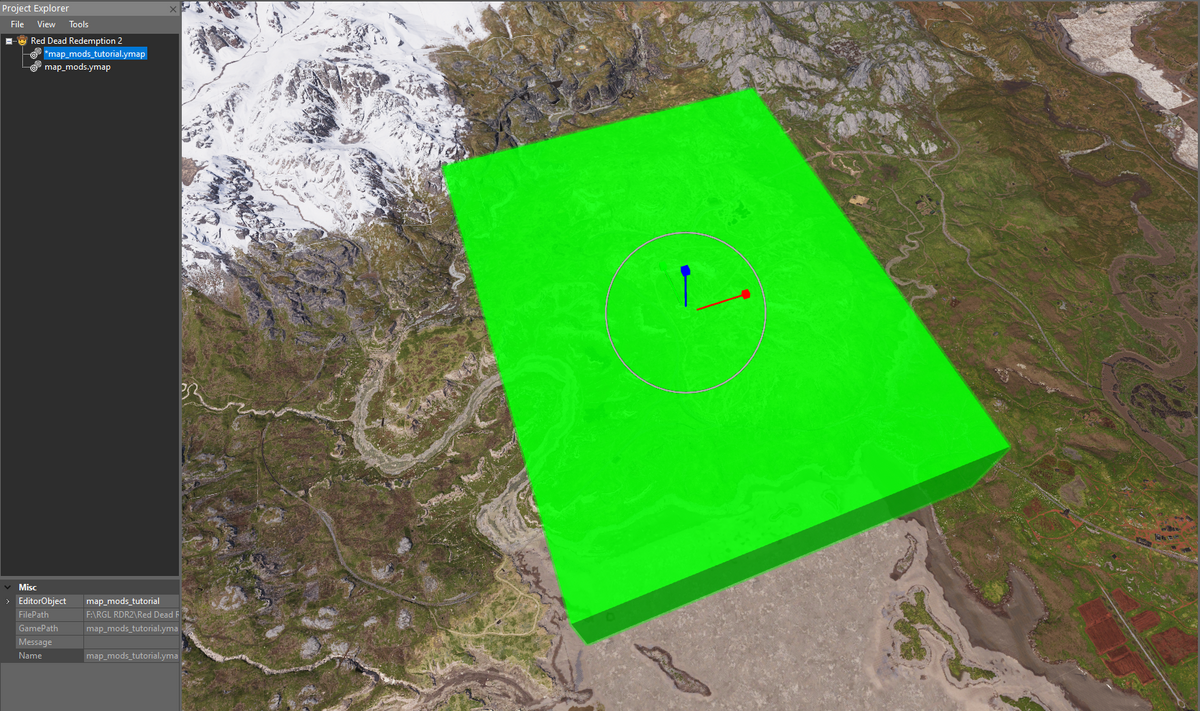
You will now see a custom timecycle box in the middle of the heartlands. This can be very finicky sometimes (codex being codex), so you may have to fly around a bit to find the right angle where it appears, but once you have it selected it will stay in view

You can use these tools at the top of codex to scale, move, and rotate the box however you want, covering the entire area you want your timecycle mod to apply to

Once you're covering the spot you need (for the sake of this tutorial i've just done the entire heartlands), you can now save the YMAP
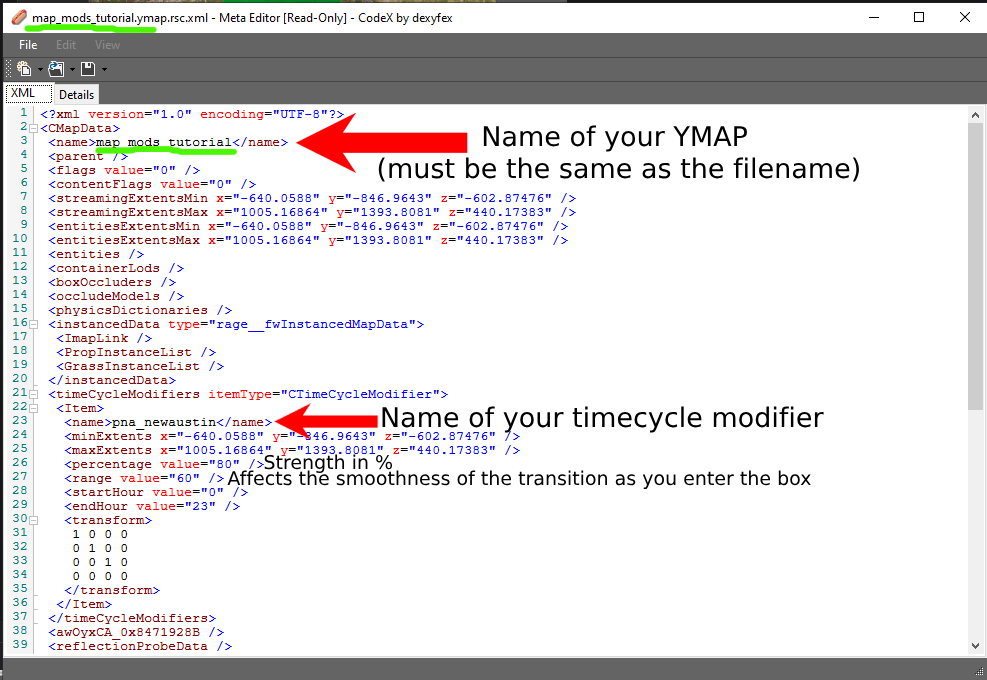
Now you can open the YMAP in Codex RPF Viewer, set the name for your YMAP and apply whatever timecycle you want. When you enter the area of the box in-game, this will be the timecycle mod that applies.
This particular YMAP will apply Project New Austin's Classic Color Scheme timecycle when you enter the Heartlands
Keep in mind these names will be hashed by Codex after closing and reopening it again. This is normal, but if you want to be able to visibly see the names, be sure to add them to the bottom of the "Codex.Games.RDR2.strings.txt" in your Codex folder. This is only visual, not doing this won't break anything
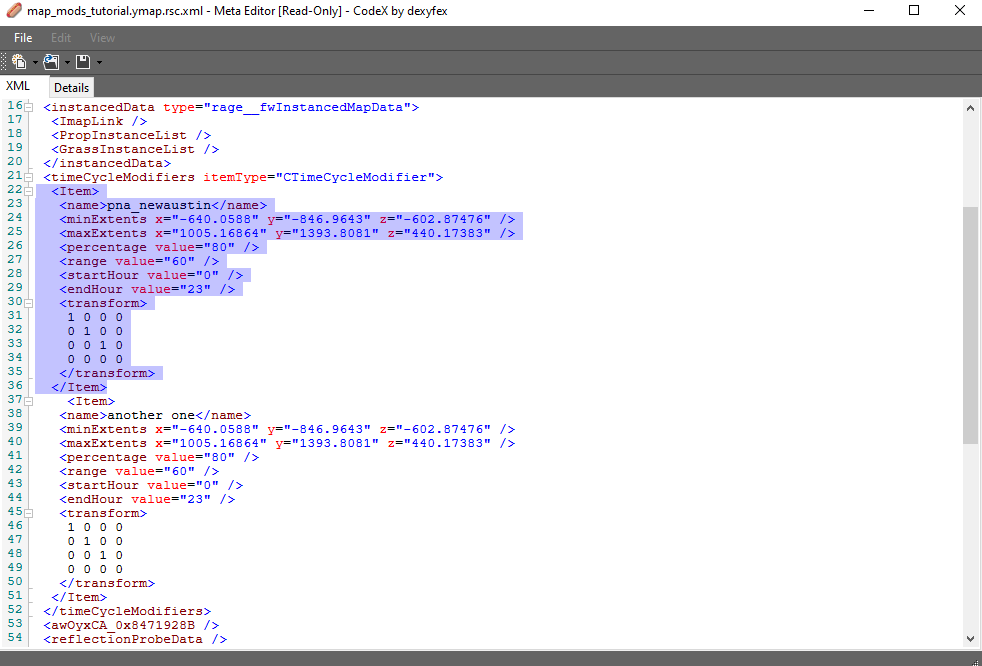
If you want more than one box in a YMAP, just duplicate the entry as many times as you need and position them in Codex as usual
Recommended Comments
Join the conversation
You can post now and register later. If you have an account, sign in now to post with your account.