


386 files (2 files filtered)
-
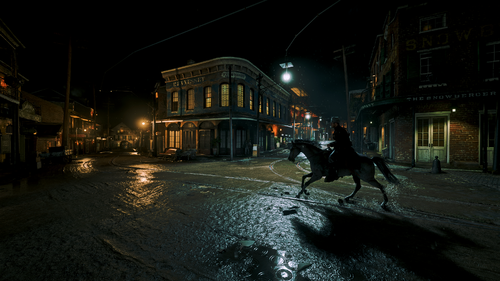
 This mod replaces the loading screen music with music from the 1992 video game The Town with No Name.
Installation Instructions
1. Extract the zip file.
2. Open the extracted folder.
There should be a folder with the same name inside.
That folder should have a install.xml file inside.
3. Assuming you have LML installed, copy the folder into the lml folder.
4. Done!
Credits
Header image and mod image source: www.mobygames.com
The Town with No Name is a video game developed by the UK company Delta 4. (Not to be confused with the Delta IV rocket.)
The game was published by On-Line Entertainment.
- 481 Downloads
- 10318 Views
- 43.23 MB File Size
- 1 Comments
WesternSpace in MiscUpdated -
 The only thing left to do to achieve 100% is visit Arthur's grave.
This save is an edited/cheat branch off of my 99% save file in the Definitive Completionist Save Game Collection
Everything in that collection was obtained via gameplay during a single play-through. (with a lot of help from Rampage Trainer)
Once I realized there were a few missing items in that collection I stopped updating it. I just didn't have another run-through in me. All but 2 of the missing items in that collection are missing due to known glitches.
So... I decided to cheat...
====================================
This save contains all obtainable documents,
valuables, and other unique items.
============================
These are the ONLY items added using the Save Editor:
Theatre Ticket - legitimately missed this one at Bronte's party. Watson's Scrapbook Page - also a legitimate miss. I forgot to go back for it. Jimmy's Pen - known glitch that it doesn't pass with Arthur's satchel to John. Letter from Penelope - I had it at one point because I did the mission it triggers but it ended up missing. Letter from Tilly - I could read it at Beecher's Hope but it wouldn't save to inventory. Rare Orchids Order - I took it from the post office wall, but it didn't save to inventory. Nite Folk Victim and Ransom Notes - I just didn't think it was right that you could only get 2 hanging body notes. 1 Bar of Gold - The event that reveals the gold bar in Rhoades never spawned for me. Camp Request Items - pipe, harmonica, mirror, fountain pen, because I was already cheating anyway.
Every other item in this save was and can be obtained via gameplay
starting from the 99% save in my Completionist Collection.
- 4,299 Downloads
- 36389 Views
- 537.1 kB File Size
JoeCoolinSC in MiscUpdated -
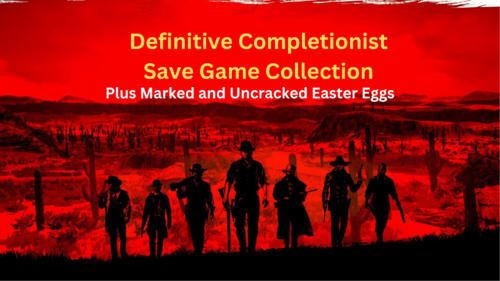 This collection of saves is from a single play-through. I wanted to provide at least one save at the beginning of each chapter from the same play-through so you can start anywhere you want knowing you can still get to 100% without missing anything.
As hard as I tried, I still ended up missing 2 missable items.
The Theatre Ticket from Bronte's party and Watson's Scrapbook Page.
If you start from Chapter 4 or earlier, you can pick these up during your play-through. If you just want EVERYTHING, I just uploaded this file: Ultimate 99.8% Save
However, the Easter Eggs in that save have all been opened.
While I did use Rampage Trainer extensively in this play-through it should be noted that Arthur Morgan never entered New Austin or the locked-down portions of West Elizabeth except for the Sean rescue mission, of course.
EASTER EGG MARKERS: Starting with the Chapter 3 save, I have placed map markers at the following easter eggs and left them in a state that you can still experience them all the way through the 99% save. There are no markers in the 100% save as all Easter eggs were opened.
HIDDEN TUNNEL on the far western edge of the map. This location cannot be sketched until after the first conversation with the Cave Hermit. Return here every day or two until all conversations are exhausted. You can't get up on the ledge where he is without cheating until all conversations have taken place. After they have, you can use the rock on the right to climb/jump up.
UFO ENCOUNTERS 1st one is the marker just NE of the letter N in Hanover. The prerequisites are completed. Just enter the cabin around 2am and be ready to run back outside and see the UFO. The 2nd UFO sighting can be made from the peak of Mount Shann at 2am.
CAVE GIANT go to the marker east of Wapiti Reservation. Once there a large flock of small birds will take flight. Follow them east to an elevated cave. Don't let anything distract you. I don't know how long these birds to take reset if you lose them. When you arrive, the giant will start the conversation from inside his cave. Like the Hidden Tunnel/Cave Hermit you are not allowed to enter without cheating. Just return for more conversation.
SAINT DENIS VAMPIRE clues have been collected. Go to the marked location in Saint Denis between Midnight and 1am to deal with the menace.
STRANGE STATUES location has been sketched in the journal, but not solved. It is marked SE of the "I" in Ambarino. Three gold bars await!
WITCHES CAULDRON is marked near the "N" in Ambarino, but I did not take a drink.
KILLER CLUES have been collected. Visit the marker below Valentine to confront the killer.
FARMER MARRIED HIS SHEEP and it didn't end well. You may have seen a sheep wearing a wedding ring around its neck wandering around near Emerald Station. The marker south of the A in New Hanover is where it apparently escaped from.
View the sick scene and collect another wedding ring.
SULKING ROBOT Marko Dragic's creation sulking on a mountain top. Only marked in saves after "A Bright Bouncing Boy".
EXPLODING HOUSE north of Tumbleweed. Marked starting in the Epilogue.
ABERDEEN PIG FARM not technically an Easter Egg but marked in Epilogue to remind you to pick up the money Arthur left for John. For story continuity you shouldn't pick it up until Beecher's Hope is paid off. Otherwise, why would you even need a loan?
=================================================================
The save game files in this collection are
divided into the following folders:
=================================================================
Chapter 2 Start (Clean)
Chapter 1 story missions complete with all gold medals.
(all story missions in this entire collection have gold medals)
Chapter 2 Cheat Start
First 4 story missions complete.
Valentine Doctor side business robbed.
(to avoid it getting stuck in your task list)
All camp upgrades and decorations.
All trapper clothing and saddles crafted.
All trapper reinforced equipment except Master Hunter Holster.
All challenges complete except Master Hunter 9 & 10.
(this is to ensure the Legendary Panther spawns later on)
All talismans and trinkets EXCEPT Owl's Feather Trinket
(acquiring the Owl's Feather Trinket early can glitch 'Archeology for Beginners')
All weapons EXCEPT Rolling Block Rifle free later in story mission.
No legendary animals killed.
No legendary fish caught.
Golden Turkuman horse.
$1000 cash.
Chapter 3 Start
Dutch's pipe, Sadie's harmonica and Molly's pocket mirror picked-up but not requested yet.
CHALLENGES complete except Master Hunter 9 & 10.
HUNTING REQUESTS (perfect carcasses) completed until they resume in the Epilogue.
STRANGER MISSIONS:
Test Of Faith (dinosaur bones) all bone locations mailed except for New Austin bones. Geology For Beginners (rock carvings) COMPLETE Cigarette Cards COMPLETE Noblest of Men and a Woman first part complete except Black Belle. Her mission is fun, but it doesn't give a unique weapon. COMPENDIUM: I decided NOT to artificially unlock the compendium, yet. There's no reason to rush. What you see is what you get.
But it's worth noting that the Gangs Section is 100% each for the O'Driscoll Boys, Lemoyne Raiders and Murfree Brood. So the frustration of looking for gang camps is eliminated. Yes, I found them for you.
LEGENDARY ANIMALS/FISH completed to the point that they can be not having been in New Austin.
The legendary Bluegill isn't available until later in Chapter 3.
ALL POINTS OF INTEREST have been sketched in Morgan's journal except for those located in New Austin, Gray's Secret which isn't available until later in Chapter 3 and the "Hidden Tunnel" aka Devil's Cave (Easter egg marker placed).
Chapter 4, 5 and 6 Starts
Included for continuity and if that's where you want to start.
Chapter 6 Point of No Return
This save is late in Chapter 6 and the last opportunity to play as Arthur in the normal sequence.
Epilogue 1 and 2 Starts
99 Percent
John's Horses:
"Silver" - Silver Turkuman "Ruby" - Red Chestnut Arabian "Rachel" - From story. "Buell" - From Hamish Sinclair veteran missions. Temporary horse at Beecher's Hope - White Arabian The only things left to do:
Catch the serial killer near Valentine. Find Tilly in Saint Denis. Find Rains Fall in Annesburg. Find Mary-Beth in Valentine. Collect the money Arthur left for John at Aberdeen Pig Farm. Permanently place the squirrel statue. (see below) Visit graves of the fallen. Visiting the graves is the only thing actually required to get to 100%. I also avoided the wandering herbalist stranger mission because I wanted "To The Ends Of The Earth" to be the name of the final save game. But since I forgot about Mary-Beth in Valentine until later, Mary-Beth is the name of the final save.
One other thing I learned at the end of this play-through... When the squirrel statue disappears from the mantle at Beecher's Hope, Abigail has hidden it somewhere because apparently, she hates it. Originally, for the "It's Art" achievement you had to finish the hide-and-seek game with her to get the squirrel permanently placed on the mantle. Now, you get the achievement the first time you place it, but it still disappears. If you want it permanently displayed, you have to find it wherever Abigail has hidden it until she finally gives up. This video walks you through this aggravating squirrel hunt step-by-step.
100 Percent
I forgot to find Mary-Beth in Valentine for her farewell cut-scene and book, but you can still do that.
With the squirrel statue permanently displayed on the mantle... I'm done!
- 15,122 Downloads
- 95049 Views
- 5.17 MB File Size
- 4 Comments
JoeCoolinSC in MiscUpdated -
 NOTE: THIS ADD-ON IS A WORK IN PROGRESS. DESCRIPTIONS OF FEATURES ON THIS PAGE REFLECT PLANNED FUNCTIONALITY. SEE THE "CURRENT CAPABILITIES" SECTION BELOW FOR WHAT THE ADD-ON CAN DO RIGHT NOW.
NOTE 2: ONLY BLENDER 3.2 IS SUPPORTED AT THIS TIME! This is due to Python versioning issues. It will be resolved in the future, but for now ONLY Blender 3.2 is supported.
RedDeadBlend2 is an add-on for Blender that allows the user to import, modify, and export drawable (YDR) and drawable dictionary (YDD) model files from the PC version of Red Dead Redemption 2.
Fragment (YFT) model file support is eventually planned, but it is not currently a priority.
Main repository: https://github.com/Sage-of-Mirrors/RedDeadBlend2
Installation
In Blender, go to Edit -> Preferences. Click the button the left-hand side that says "Add-ons." Click the button in the top-right that says "Install..." Select the RedDeadBlend2 ZIP file and press "Install Add-on".
You should now find a sub-menu under File -> Import labelled "Red Dead Redemption 2". Use the options under this menu to load your desired files.
Current Capabilities
Importing YDR: Geometry (vertex & face data) Normals Vertex colors Tex coords Skeleton (joints & vertex skinning) Importing YDD: Most of the YDR features above except skeletons, in some cases; dictionaries are tied closely to fragments
Roadmap
YDR
Basic geometry importing (COMPLETE) Skeleton importing and vertex skin setup (COMPLETE) Shader and shader parameter importing Shader selection and shader parameter editing Basic geometry exporting Skeleton exporting Shader and shader parameter exporting Expression importing Expression exporting
YDD
Expand YDR support (COMPLETE) Importing contained YDRs (COMPLETE) Exporting multiple YDRs
Changelog
Beta 2:
Update YDR loading to include normals, vertex colors, and tex coords. Also implement basic YDD importing. Only works with Blender 3.2 due to Python versioning shenanigans. Beta 1:
Initial release. Includes only geometry and skeleton importing, and may be unstable. Only works with Blender 3.2 due to Python versioning shenanigans. -

- 1,030 Downloads
- 23144 Views
- 45.81 kB File Size
- 2 Comments
Updated -
 I present to your attention Ultra-realistic preset with ideal colors and white balance. Designed for powerful PC.
1) Differs in the highest detail
2) Working HDR
3) Correct color correction and white balance
4) Realistic sunrises and sunsets
5) The color of the sky has become more correct
6) Clouds are now more pronounced
7) Improved glare from surfaces (stones, water, roofs of buildings)
9) Lighting from lamps, fire and other light sources now looks more realistic and correct. A soft light appeared.
10) Improved shadow effects
Be sure to follow the last two points, otherwise you will have an oversaturated picture!
1) The color profile must be in the video adapter settings: sRGB IEC61966-2.1 or Apple RGB (color management).
2) On the NVIDIA Control Panel, Modify Settings tab, the Output Dynamic Range must be set to Limited
Attention: for a perfect picture in the game itself, "Scaling" from 1.5 to 2.0 must be enabled (depending on your video card). Alternatively, you can use native 2k or 4k resolution. Also in the settings, it is desirable to set the maximum volumetric effects and geometry!
Designed exclusively for high performance computers!
My Discord: https://discord.gg/BbavTG7
Buddy, if you liked my preset, leave your approval and your voice! You can leave your wishes in the comments 🙂
- 28,824 Downloads
- 189657 Views
- 39.02 kB File Size
- 6 Comments
Updated -
 A lightweight mod that slows the game down with a press of a button. Someone told me to create this mod because two other similar mods used outdated scripthooks.
Installation
Just drop the .asi file into the RDR2 game directory.
Config
This mod generates the config file automatically after you run the game with the mod for the first time. The key to activate slow motion can be changed here and the speed can also be changed.
Antivirus Disclaimer
Some antiviruses (Specifically MaxSecure and SecureAge APEX) may flag the mod as a virus. This is a false positive. If your antivirus keeps deleting the .asi file, please add it to the exclusions.
Config File Error
If you get an error that says:
This usually means the game folder has the incorrect permissions set up. To fix this, follow these directions:
1. Find your game folder. For steam users, the default location is "C:\Program Files (x86)\Steam\steamapps\common\Red Dead Redemption 2"
2. Right click on the Red Dead Redemption 2 folder and click properties.
3. Go to the security tab on the window that pops up.
4. Click Advanced.
5. Set the owner of the folder to your windows username by clicking change near the top.
6. Click apply, then close and open the window.
7. Find CREATOR OWNER in the list and double click on it.
8. Check the Full Control box and click OK.
9. Repeat steps 7 and 8 for Users and Administrators.
10. Click OK and close all other related windows. You are now done!
If you get no error and the mod does not seem to work at all, the mod is not being loaded. Make sure that you have scripthook and an asi loader installed properly. Also make sure that you had extracted the files for those mods and this mod.
Open Source
This mod is open source and uses the MIT licence.
- 4,380 Downloads
- 40750 Views
- 316.74 kB File Size
- 11 Comments
Updated -
 BEFORE COMMENTING, PLEASE READ THE FAQ.
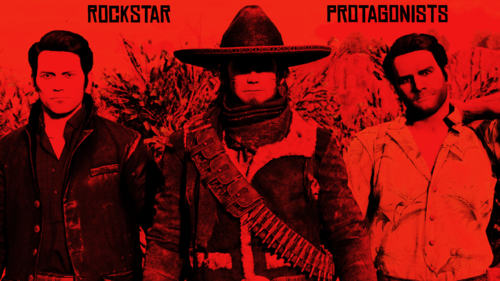
Adds characters from Rockstar games into the world of RDR2. Think of them as the great, great grandpas of the protagonists you know and love.
Each character contains as many as two different options for ped replacement, and up to two outfits with the exception of Tommy and Michael.
They can be integrated seamlessly into the game and spawned whenever you want via a trainer.
Installation:
Drop "RP Textures" into your lml folder.
Choose a replacement for a character and drag the "stream" folder into your lml folder. You can have as many of these running as you want.
ROCKSTAR PROTAGONISTS:
Redemption Red Harlow:
- Can replace Hamish
- Can replace Emmet Granger
- Playable as John
Classic Red Harlow:
Includes custom expressions.
- Can replace Sheriff Freeman
- Can replace Rhodes Fence
- Can replace rio donkey rider
Trevor Philips:
Denim Jacket and North Yankton inspired outfit
- Can replace Micah
- Can replace Grizzled Jon
- Can replace the Laramie Boy
Niko Bellic:
Default outfit and beta inspired outfit
- Can replace Guarma Frenchman
- Can replace German Father
Johnny Klebitz:
TLAD outfit and GTA IV inspired outfit
- Can replace NPC John
- Can replace Cooper
- Can replace Agent Hixon (multiplayer)
Claude:
Default and Playa2 outfit
- Can replace Joe
- Can replace Clive
Michael De Santa:
- Can replace Valentine Gunsmith
- Can replace Famous Gunslinger 6
Tommy Vercetti:
- Can replace Hercule
- Can replace Guido Martelli
HUGE credit to Ratcretinlord for big help with textures, and to BHMaster for his custom red harlow expressions.
FAQ:
Q: Why didn't you make these addon peds?
A: I pretty much exclusively play the story and sandbox, so I like seeing my work get interwoven into the world. If you have an npc you really want to keep, there are plenty of other replacement options for each protagonist. I just can't see myself spending extra time on this mod for that.
If someone in the community wants to make these addon peds, you have full permission to do it and upload anywhere.
i would appreciate credit but i'm in this for the community getting cool stuff, and not clout for an anonymous internet account.
Q: Certain parts of the characters are invisible!
A: You don't have online assets loaded in. Try downloading version.dll or the online content unlocker.
Q: This doesn't work at all!
A: You need lenny's mod loader. Make sure your version is up to date. If you have that installed and are still experiencing problems, 99% chance you installed something incorrectly. Retrace your steps.
Q: Future plans?
A: Ideas? Definitely. Stuff can be improved on? Absolutely. Do I have all the time in the world? No. I don't want to promise anything I can't deliver on.
This mod will break the online character agent hixon's textures since I used them as a placeholder.
- 3,312 Downloads
- 57513 Views
- 82.17 MB File Size
- 2 Comments
Updated -
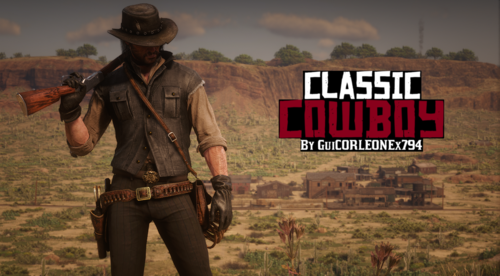 A mod that changes some of the textures and models of the cowboy outfit, making it more accurate to the Red Dead Redemption Cowboy outfit.
Compatible with the John Marston Restoration Project.
Installation:
Download the latest version of Lenny's Mod Loader and put the folder "LML" in the game's directory.
- 17,834 Downloads
- 345056 Views
- 92.76 MB File Size
- 5 Comments
Updated -
 This is a file listing that links to the official dev-c.com website for Scripthook RDR 2. To download this file, follow the instructions on the page that you will be directed to.
Script Hook RDR 2 is the library that allows to use RDR2 script native functions in custom *.asi plugins. Note that it doesn't work in RDR Online, script hook closes RDR 2 when player goes in multiplayer, see details in the readme.
This distrib also includes the latest Asi Loader and Native Trainer.
-
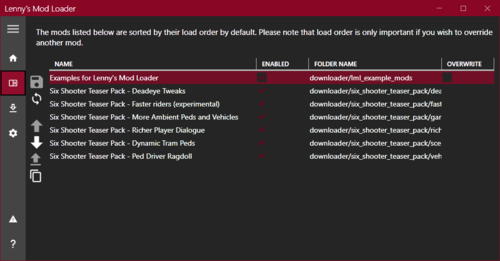 The general idea of Lenny's Mod Loader is to provide an easy way to modify the game. In its current state for RDR 2 it will allow you to replace any file in the game, whether they are streaming files such as models or data files, font files etc. It also includes full UI support akin to the GTA V version.
The three screenshots show replaced assets, replaced font and an altered meta file to change the police response in Valentine to Saint Denis police. These are all provided in an example download, see "Examples" further down below for more information.
Installation
1.) Copy all files from "ModLoader" into your RDR 2 game root folder so that files such as vfs.asi are in the same folder as your RDR2.exe.
2.) The Mod Manager folder can be anywhere and does not need to be inside the game folder.
3.) New mods go into lml folder or use the button "Download with Mod Manager" on the mod website if it is supported (see installation video for an example).
Beta 11 highlights - Data file merge and manifest support
A few new exciting features are part of this update. First, support for overriding files used very early during game load has been improved significantly. While I hope that this does not cause any side-effects, please let me know if mods that worked well previously no longer function correctly. For instance, it was not possible in previous versions to override the skydome textures to change the moon. Thanks to @VideoTech for testing.
Second, data file loading allows you to separate your changes to certain files, such as assets_* or metapeds into individual files so that you no longer have to modify the existing one (effectively merging them). This should make it a lot easier to create mods such as custom peds since you can contain most changes to separate files. Please note that this does not magically work for all games files but only those where the internal game parser supports additions (so no catalog for instance). In addition, custom manifest files for peds and maps are supported now. The ped support has been tested extensively, but map support will only really become useful once CodeX can generate these files for you. An example for these features is provided in the download courtesy of BHmaster.
Beta 9 highlights
Very much a maintenance update, this version hopefully fixes the random DRM integrity crashes. Thanks a lot to @calledme.kev who spent tens of hours testing various builds to find the issue! It also adds a lot of caching for collection calls that rely on read-only data, so LML should be a little less demanding.
Beta 8 highlights
This version adds a few new features such as allowing you to override the _manifest.ymf and _cache.ych files found in RPFs. Support to replace hashed files has also improved and now includes ymaps among other file types. The streaming folder now loads pso files, such as ymap, as text files, too. Most data files that are forced to be loaded as pso by the game have been patched to support being loaded as text files, such as cameras.ymt or the archetype definitions. Due to heavy refactoring to improve startup performance, previous builds are still made available. See changelog for more details.
Ymap & Ytyp support (beta 7)
This version introduces experimental support for ymap and ytyp. Two very simple examples are included that move some of the blue barrels around Valentine (check behind the saloon) via a different ymap and that make the lights inside the Saloon much brighter (ytyp - thanks to Modifiver). For ymap modifications, if you unload the imap via script and modify the file on disk, the changes will be applied on reload so no need to restart the game.
Bk2 support (beta 7)
Bink files were technically already supported in previous versions but caused some problems. In the current version they still behave somewhat differently in that they need to have two '.' in their file name as the extension '.bk2' is part of the actual file name. So name your file "movie.bk2.bk2" to make sure it gets replaced correctly. An example for replace would be "replace\movies_0\movies\filename.bk2.bk2".
Settings file (beta 7)
A settings file has been added that is to be placed in the game's root folder and called lml.ini. It is mostly geared towards developers and allows for more verbose logging output (or less..) making it easier to identify files you want to replace. If you set the log level to 0 you can see most of the game's requests to load files and it should be much easier to correctly identify the path you want to replace. Please note that many files are only loaded via hash and not via their name. You can also choose to disable the streaming and replace folders if you do not use them for added performance.
Ymt support (beta 5)
The biggest new feature in this update is the support for ymt file editing even if the source file contains unknown hashes. In order to replace a file, export the ymt to xml with OpenIV and then either use replacement via install.xml or the replace folder to replace the original file. Since you are replacing the ymt file, make sure that your file also has the ymt extension even though it contains xml. For the replace folder method you also need to match the file name. Now you can edit the file in plaintext and the game will treat it as a ymt with all names fixed up when loading. See the included examples for more information.
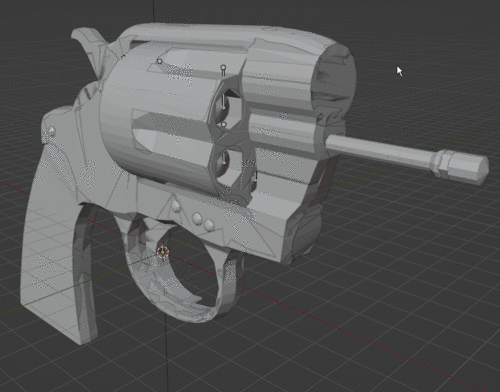
If you do end up finding a file where you feel that it is not properly fixed up by LML (for instance when exporting the file directly from OpenIV without any changes breaks the game), please let me know. The only file I know of that will currently cause problems is weapons.ymt, but this is not due to LML but because of an export bug in OpenIV which cuts off certain weapon flags. The High-Roller revolver example has these flags manually restored and hence works fine, but this is not the case when exported directly from OpenIV. I have notified the team and trust that they will fix this export problem in the future. Until then you will have to manually inspect the ymt, gather the flags and restore them manually in the xml for weapons if you plan to use them. Please note that this requires advanced knowledge of game structures.
Ymt Examples
This download comes with extensive examples courtesy of @Modifiver that modify various aspects of the game. Check them out in the included examples folder and copy them to your lml folder to try them out!
Upgrading from earlier LML versions without install.xml support (beta 2 and earlier)
This version of Lenny's Mod Loader introduces install.xml files to instruct LML on how to load your mods. Thus, mods can be separated in folders and no longer require nested folder structures. This is a proven concept from our GTA V version and has now been ported over. You can still use the replace and stream folder under your lml folder. Please note, however, that the Mod Manager UI will only pick up mods that use the new install.xml system so it is recommended to convert your mods to the new system. Only mods using install.xml support Download with Mod Manager. Consult the examples below to learn how to use the new system.
Examples
You can find more examples by @Modifiver here:
https://www.rdr2mods.com/downloads/rdr2/mods/80-modifivers-six-shooter-teaser-pack/
More examples with detailed documentation on the new install.xml system can be found here:
https://www.rdr2mods.com/downloads/rdr2/mods/77-examples-for-lennys-mod-loader/
Verify your file got replaced
If you feel that your file is not being replaced properly, have a look at the log file and see if you can find any entry related to it. Perhaps the path was not correct and hence it did not work. Search for "replaced" for files in replace and "adding" for files in stream.
Support
Since this is the first release for RDR I expect there to be quite a few problems and certain files might not work as expected. If you have trouble replacing specific files, please do not hesitate to comment here or reach out and include your modified file and file structure so I can have a look.
Installation Video
Please find a detailed installation video including a guide through our examples here (thanks to @Gan Ceann)
Detailed explanation of stream vs replace (older versions)
In the lml folder you can find two subfolders, one called "replace" and one called "stream". Both can be used for the same thing but replace is ultimately more powerful, but also more advanced. The stream folder you might recognize from Map Editor or Rampage Trainer and just loads streaming files directly.
Stream
As mentioned, similar to other tools available this merely loads streaming files into the game when the game is loading. For instance, model or texture files would go in there and will replace the existing assets in the game. If you do not know the name of an asset, but only its hash, simply name it 0xhash.ext (e.g. 0x9E54B506.ytd for w_melee_machete01+hi.ytd) and it will still be recognized and replace the asset correctly.
This is the most convenient way to quickly replace streaming files as you do not have to worry about where in the game files they are located but only their name.
Replace
This folder creates a virtual mapping of the entire game file structure and hence allows you to replace any game file, granted you know its full location. This is similar to the paths you can see in OpenIV when navigating RPFs, but not exactly the same. If you want to change the dispatch.meta file for instance, you will need to modify it in update.rpf, as the one in common.rpf is superseded by that. To do that, you would create the following structure: "replace\update\common\data\dispatch.meta". This is exactly the path you would use in OpenIV (without the .rpf ending for update). Now, whenever the game wants to access this file, it will load yours instead. It is that simple!
If you want to replace the font file font_lib_efigs.gfx in scaleform_frontend.rpf for instance, you would create the following structure: "replace\update\x64\patch\data\cdimages\scaleform_frontend\font_lib_efigs.gfx".
Word of caution: File paths do not always match their RPF names unfortunately, hence this is a bit more advanced but also allows greater control. Say you want to replace player_zero_coat_001_open.ydd which is present in both packs_1.rpf (original) and dlc.rpf (from patchpack001, an update to the file). Files DLCs follow a slightly different pathing scheme. The full path to this file would be "replace\dlc_patchPack001\x64\packs\base\models\component_models\player_zero_coat_001_open.ydd". As you can see, it does not match the file path directly, which is also why for many files using the stream folder is just simpler. This is because the game maps some files differently and when you open the dlc.rpf (in patchpack001) and its setup2.xml you will see why: the device name is dlc_patchPack001 which is the "root" of all files inside this archive. Thus the path starts at "dlc_patchPack001" and then follows the RPF structure until you arrive at "replace\dlc_patchPack001\x64\packs\base\models\component_models\player_zero_coat_001_open.ydd". Not that complicated, but certainly not as easy as the streaming folder and something to look out for.
Acknowledgements
Thanks to NTA for his work on fwEvents, hooking, fiDevice and sysAllocator
Thanks to listener for his work on fiDevice and advice over the years (hope you are well!)
Thanks to the OpenIV team for OpenIV
Thanks to dexyfex for CodeWalker
Thanks to Gan Ceann, Will and GameRoll for testing as well as Jewels, GuiCORLEONEx794, jack.sharif and Modifiver for providing example assets
-
 This tool allows you to create custom loading screens and configure settings for each slide.
How to Create a Custom Loading Screen Mod
1. Open the app from the .exe file. For computers that have common file extensions disabled, it would be called RDR2LoadingScreenGenerator (without the .exe at the end).
2. Enter the name, the author, the version (Default is 1.0.0), an optional link to the mod page, and optional metadata.
3. Import images by clicking on Edit at the top left, then click Import. The program only supports PNG and JPEG image files. You can import multiple images at the same time by selecting multiple image files.
4. Optional - Select an image from the list in the middle. A preview of the image will appear on the top right. You can configure settings for the picture right below the picture itself.
5. When you are done configuring settings for the pictures, you can create a LML mod by clicking on File>Export. You can also export as a zip if you are planning on transferring the mod over the internet.
6. A window should appear, telling you what folder to put the mod in. You can put it anywhere, but if you want the test the mod, go to your RDR2 installation, and select the lml folder. (If you don't have an lml folder, make sure that you have LML installed.) Now click Select Folder and your mod should be inside the lml folder.
7. Open RDR2 to see if the loading screen images are now custom.
Notes
Cynet may flag RDR2LoadingScreenGenerator.dll as malicious. This is a false positive.
- 361 Downloads
- 12036 Views
- 303.34 kB File Size
Updated -
 To install just drag the two .ytd files into the stream folder located inside of the lml folder. After that you're all set! Enjoy!
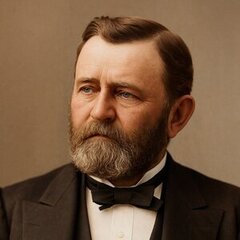
I made this mod because Rockstar gave Captain Monroe the rank insignia of Second Lieutenant instead of the rank insignia of Captain, They also gave him blue infantry shoulder boards which were discontinued in 1885 and were replaced with white infantry shoulder boards that year. For some reason Captain Monroe also had a black stripe on his pants which is supposed to be the color of his service color (white-infantry) but now I am correcting this mistake by changing the so you could see the world with a bit more historical accuracy 🙂
- 892 Downloads
- 14908 Views
- 16.85 MB File Size
Updated -
 Corrects the Rank Insignia for Colonel Favours instead of having the rank insignia of Brigadier General on his shoulder boards.
To install unzip and drag the two ytd files into the stream folder of lml
Enjoy!
- 803 Downloads
- 13904 Views
- 15.54 MB File Size
- 1 Comments
Updated -
 This removes the online button from the pause menu, that is what this mod does!
- 5,801 Downloads
- 22747 Views
- 2.44 kB File Size
WesternSpace in MiscUpdated -
 What does this mod do?
Main File: This mod takes the horse harness from online and removes the lantern altogether, replacing the large saddle bag. As a result of this, some NPCs will also use harnesses which feels more natural than you being the only one to use it. It also features different color variations depending on which color large saddle bags you select.
Tutorial Version: Contains a tutorial so that your horse can wear the horse harness from Online and keep all components intact.
Is this mod accurate to the real world and more specifically, the Old West?
This mod aims to add an extra layer of realism to the game as breast collars were used from time to time in the Old West and they are also used sometimes in Western movies. Cowboys and riders today use breast collars to keep their saddles from sliding backwards, so if you use one of these IRL I hope this mod allows you to better recreate your actual saddle setup.
How do I install this mod?
You'll need Lenny's Mod Loader and Version.dll in order for it to work.
Main File: Simply drop the file into your lml > stream and you should be good to go. Once the mod is installed, equip the large saddle bag via the stable if you haven't already and it should appear on your horse.. unfortunately you won't be able to see the collar until you exit the stable but you'll know it's equipped once your saddle bag goes away.
Tutorial Version: Follow the tutorial.
I happen to like my saddle bags, can this mod replace something else?
Main File: Yes, it should also be able to replace horns, small saddle bags, or bedrolls. All you need to do is change the filename to the name of the model's .ydd file which you can find through OpenIV and you should be good to go!
Tutorial Version: The tutorial will show you how to keep them!
NOTES:
You only need one version or the other, though you're welcome to use both if you so desire.
While the colors in the "color variations" picture reflects the main file, you can sort of change the color a bit for the tutorial version by editing the three numbers following value= in the Step 3 file. Use the horse color palette from here to get an idea of what the color is gonna be.
Horse Harnesses-1838-1-0-1670825101.rar TUTORIAL TO KEEP ALL ACCESSORIES AND HAVE ORIGINAL TEXTURES.zip
- 1,680 Downloads
- 24345 Views
- 713.13 kB File Size
- 1 Comments
Updated


.thumb.PNG.9b1b9bdbbaae8edb695ac8be487eeac3.PNG)